Installing 220 Gems in 40 Seconds
I gave a lightning talk at RubyConf in 2017 about a gem I was working on at the time called prebundler. I recently spent a bunch of time improving it, so I thought I’d write up a post.
Back in 2017 I worked for Lumos Labs, the creators of Lumosity. We had recently transitioned from a custom Capistrano setup to Docker and Kubernetes for deploying our large Rails monolith. While we were pretty darn happy with it, the slowness of our Docker builds eventually became a major pain point. It would sometimes take over 30 minutes for CI to run, and while we used CI to run tests and a few other things as well, by far the most time-consuming part was building the Docker image. I decided to investigate.
Right off the bat, I identified two major sources of slowness:
- Building static assets.
- Running
bundle install.
I’m going to focus on the second bullet point in this blog post.
Docker vs Capistrano
In our Capistrano setup, installing gem dependencies was really fast, so we didn’t have to worry about it. That’s because Capistrano works by running commands on a remote machine over SSH. Every time you deploy, Capistrano runs bundle install for you. Most of the gems you need are already present on the machine from the previous deploy, so Bundler only has to fetch and install any new or upgraded ones.
In contrast, Docker images are built from scratch every time. In other words, Bundler has to fetch and install every gem every time you build a new container image. Depending on how many gems your app needs to run, this can take really long time. Considering that dependencies can themselves depend on other gems and so on, your app probably depends on a lot more than just what’s listed in your Gemfile. Furthermore, many popular gems contain native extensions - usually written in C - that need to be compiled during the installation process. Compilation time can add a significant amount of additional overhead.
Time Lost
In April of 2017, the repo for lumosity.com (lumos_rails) contained 445 gem dependencies. That included both entries in the Gemfile and so-called transient dependencies, i.e. gems depended upon by other gems. It took our Travis CI builder job over six minutes to install them all inside the container image.
Six minutes might not seem like a lot of time, but compounded over a month, a week, or even a single day, those 6 minutes add up quickly. Our team ran about 30 builds per day which translated into spending 3 hours a day, 15 hours a week, 60 hours a month just waiting for bundle install.
Bundler Improvements
In the not so distant past, Bundler introduced some nice new features for speeding up installation. For example there’s the handy --jobs n flag, which will install gems in parallel using n threads. However only the I/O bound parts of installation are affected, since Ruby’s global VM lock (GVL) prevents multiple Ruby execution paths from running concurrently. Moreover, building native extensions is still a problem.
What more can we do to speed things up?
Enter Prebundler
Back in 2017 I started thinking about ways to address the native extensions problem. It seemed like a waste of time to recompile extensions for every Docker build, especially considering the resulting .so files can be cached. Caching would have to be done outside of Docker though, since Docker only caches entire layers (i.e. the full result of a bundle install) and not individual gems.
After some noodling, I came up with an idea: why don’t we stick all the gem’s files (including compiled native extensions, etc) into a TAR file and store it in some object storage system like S3? Installation would then be as simple as downloading the TAR file and expanding it onto the hard disk somewhere. All these operations are I/O bound, meaning the installation process can be highly parallelized.
I coded up a solution and integrated it into lumos_rails. Our team saw bundle install time decrease from 6 minutes 7 seconds to 43 seconds - that’s an 88% speed up!
Prebundling Discourse
To demonstrate the sort of speed-ups prebundler can enable, let’s take a look at the Gemfile from Discourse, a large, open-source Rails app.
By the way, all the code for this example can be found in the prebundler_bench repo.
At the time of this writing, Discourse has 220 direct and transient dependencies. Here’s a Dockerfile that installs all the gems from Discourse’s Gemfile without prebundler:
FROM ruby:2.7
WORKDIR /usr/src/app
COPY Gemfile* ./
RUN bundle install --jobs $(nproc)
Now, here’s a Dockerfile that uses prebundler instead:
FROM ruby:2.7
ARG PREBUNDLER_ACCESS_KEY
ARG PREBUNDLER_ACCESS_SECRET
WORKDIR /usr/src/app
RUN gem install prebundler
COPY Gemfile* ./
COPY .prebundle_config ./
RUN prebundle install --jobs $(nproc)
Finally, here’s the contents of the .prebundle_config file:
Prebundler.configure do |config|
  config.storage_backend = Prebundler::S3Backend.new(
    client: Aws::S3::Client.new(
      region: 'default',
      credentials: Aws::Credentials.new(
        ENV['PREBUNDLER_ACCESS_KEY'],
        ENV['PREBUNDLER_ACCESS_SECRET']
      ),
      endpoint: 'https://us-east-1.linodeobjects.com',
      http_continue_timeout: 0
    ),
    bucket: 'prebundler',
    region: 'us-east-1'
  )
end
We can now build the images like so:
# regular installation using bundler
docker build \
    --no-cache \
    -f Dockerfile \
    -t prebundler_test:latest .

# faster installation using prebundler
docker build \
    --no-cache \
    --build-arg PREBUNDLER_ACCESS_KEY=${PREBUNDLER_ACCESS_KEY} \
    --build-arg PREBUNDLER_ACCESS_SECRET=${PREBUNDLER_ACCESS_SECRET} \
    -f Dockerfile-pre \
    -t prebundler_test:pre-latest .
NOTE: don’t forget to populate PREBUNDLER_ACCESS_KEY and PREBUNDLER_ACCESS_SECRET with the contents of your S3 credentials when you run the script.
The Results
Building both images on my MacBook Pro produces the following output. The docker build command now helpfully times every operation, so we can see how long bundle install took vs prebundle install.
Here’s the output for regular installation using bundler:
[+] Building 185.7s (9/9) FINISHED
 => [internal] load build definition from Dockerfile   0.0s
 => => transferring dockerfile: 129B                   0.0s
 => [internal] load .dockerignore                      0.0s
 => => transferring context: 2B                        0.0s
 => [internal] load metadata for ruby:2.7              1.2s
 => [internal] load build context                      0.0s
 => => transferring context: 14.29kB                   0.0s
 => [1/4] FROM docker.io/library/ruby:2.7              0.0s
 => CACHED [2/4] WORKDIR /usr/src/app                  0.0s
 => [3/4] COPY Gemfile* ./                             0.0s
 => [4/4] RUN bundle install --jobs $(nproc)         179.2s
 => exporting to image                                 5.2s
 => => exporting layers                                5.2s
 => => writing image                                   0.0s
 => => naming to prebundler_test:latest                0.0s
And here’s the output for installation using prebundler:
[+] Building 48.3s (11/11) FINISHED
 => [internal] load build definition from Dockerfile   0.0s
 => => transferring dockerfile: 191B                   0.0s
 => [internal] load .dockerignore                      0.0s
 => => transferring context: 2B                        0.0s
 => [internal] load metadata for ruby:2.7              0.5s
 => [internal] load build context                      0.0s
 => => transferring context: 533B                      0.0s
 => [1/6] FROM docker.io/library/ruby:2.7              0.0s
 => CACHED [2/6] WORKDIR /usr/src/app                  0.0s
 => [3/6] RUN gem install prebundler                   3.3s
 => [4/6] COPY Gemfile* ./                             0.0s
 => [5/6] COPY .prebundle_config ./                    0.0s
 => [6/6] RUN prebundle install --jobs $(nproc)       39.9s
 => exporting to image                                 4.4s
 => => exporting layers                                4.4s
 => => writing image                                   0.0s
 => => naming to prebundler_test:pre-latest            0.0s
As you can see, bundler took 179.2 seconds while prebundler took only 39.9. That’s a 78% speed increase! Note that because we had to install the prebundler gem in a separate build step, the overall speed increase is actually closer to 74%. Pretty good, I’d say!
Setting up Prebundler in your App
As you may have noticed, I used Linode’s object storage offering in the Discourse example above. As it happens, many of the object storage systems available from the various cloud providers are S3-compatible, requiring no changes to the example prebundler config I showed earlier.
Let’s walk through the necessary steps one by one.
-
First, you’ll need a Linode account with object storage turned on. Linode charges a flat monthly fee under a certain storage limit. At the time of this writing, it costs $5/mo for 250gb of storage.
-
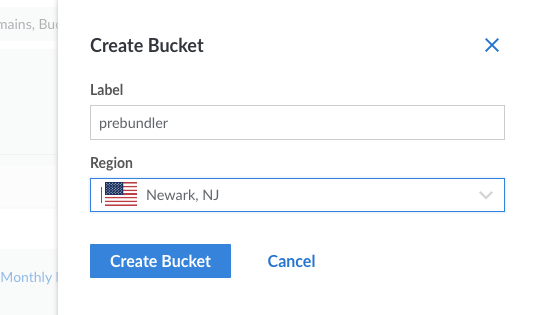
Create a bucket where all your TAR files will be stored. I called mine “prebundler.”

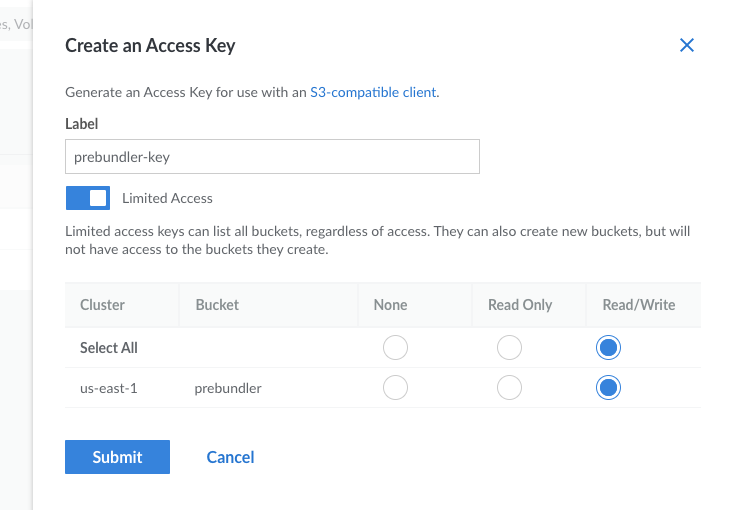
- Create the access key prebundler will use to store and retrieve TAR files. It’s a good idea to give it only the access it needs, i.e. read and write access to the prebundler bucket only.

-
Make sure to store the access key and secret in a secure location like a password manager or other credentials store.
-
Install prebundler by running
gem install prebundler. If you’re using a Ruby version manager like rbenv or asdf, don’t forget to runrbenv rehashorasdf reshim rubyto make theprebundlecommand available in yourPATH. -
Create a .prebundle_config file in the root of your project and copy/paste in the configuration given above. Make sure to change the endpoint and region if you created your bucket in a region other than us-east-1.
-
Add two
ARGs to your Dockerfile, one each for the access key and secret key. Add aCOPYdirective to copy in the .prebundle_config, and finallyRUN prebundle installinstead ofbundle install -
Last but not least, build your Docker image. Don’t forget to pass two
--build-argarguments containing the access key and secret.
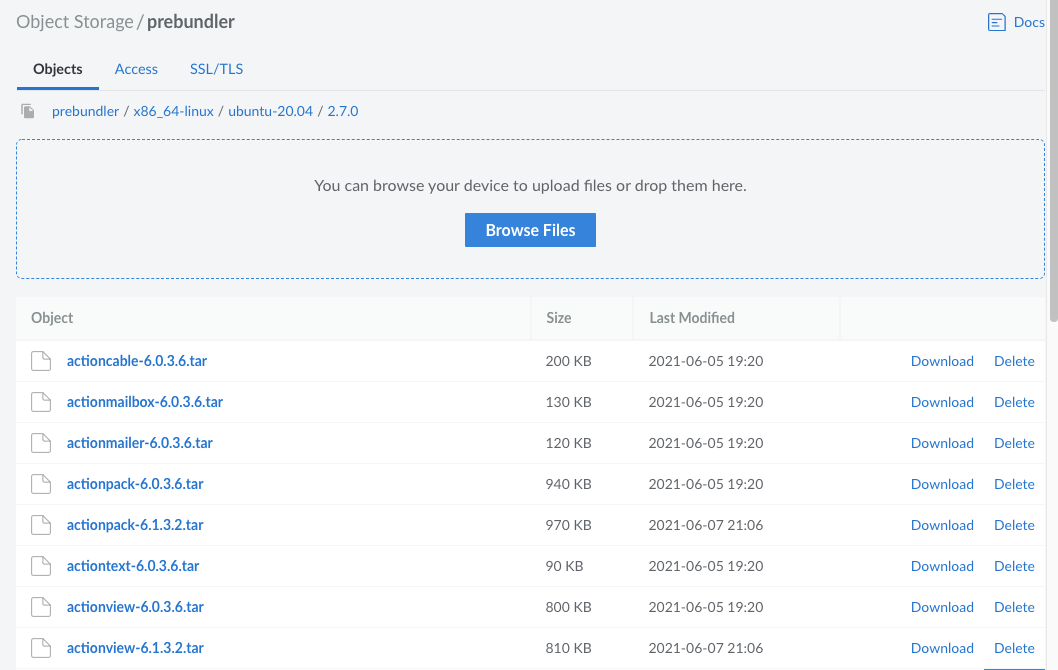
After building the image, you should see a bunch of TAR files in your object storage bucket:

Conclusion
If installing gem dependencies is slowing down your CI builds and blocking releases, consider giving prebundler a try. If you run into trouble, please don’t hesitate to file an issue or, better yet, submit a pull request :)